How to Setup Cisco Packet Tracer on Linux

Growth mindset in the tech field, Front-end "React Js, Vue Js", Project Manager, Digital Marketer.
Cisco Packet Tracer is a robust networking simulation tool that students and professionals use to learn and practice networking fundamentals. Although it is primarily intended for Windows and macOS, it can also be used on Linux by following a few extra steps. We'll walk you through setting up Cisco Packet Tracer on a Linux system. Before continuing, please confirm that you have already downloaded the “.deb” file from the Cisco Networking Academy website.
Prerequisites
Before we start, here are a few things you'll need:
Linux Distribution: You will require a Linux distribution, such as Ubuntu, Debian, or any other Debian-based distribution.
Cisco Packet Tracer ".deb" File: As was previously noted, you were supposed to have downloaded the Cisco Packet Tracer .deb file from the Cisco Networking Academy website.
Steps for the Cisco Packet Tracer Installation
Step 1: Open Terminal
Open a terminal on your Linux computer first. The terminal is typically accessible through your apps menu or by pressing the keyboard shortcut Ctrl + Alt + T.
Step 2: Navigate to the Download Directory
Go to the directory where the Cisco Packet Tracer ".deb" file is located. The 'cd' command can be used to switch directories. For instance:
cd ~/Downloads
This command assumes that the file has already been downloaded to your Downloads directory. If it's somewhere else, change the path to reflect that.
Step 3: Install Dependencies
Before we can install Cisco Packet Tracer, we must first confirm that all the required dependencies are present on your machine. Run the command line:
sudo apt-get install libnss3 libx11-6:i386 libasound2 libatk1.0-0 libc6 libcairo2 libcups2 libdbus-1-3 libexpat1 libfontconfig1 libgcc1 libgdk-pixbuf2.0-0 libglib2.0-0 libgtk-3-0 libpango-1.0-0 libpangocairo-1.0-0 libstdc++6 libx11-6 libx11-xcb1 libxcb1 libxcomposite1 libxcursor1 libxdamage1 libxext6 libxfixes3 libxi6 libxrandr2 libxrender1 libxtst6 zlib1g
This command will ensure that all the required libraries are installed.
Step 4: Install the Cisco Packet Tracer
Now, it's time to install the Cisco Packet Tracer. Use the following command to install the ".deb" file:
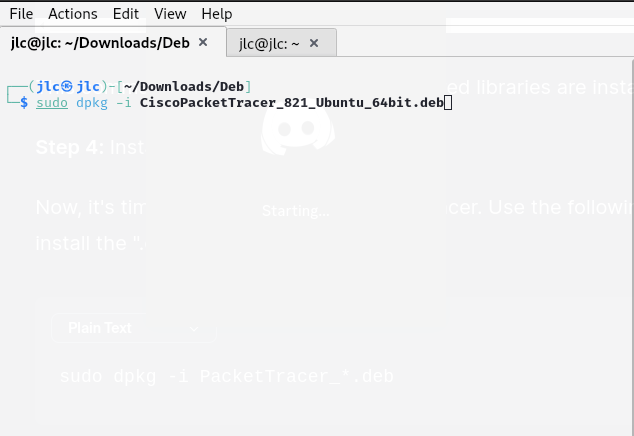
sudo dpkg -i PacketTracer_*.deb
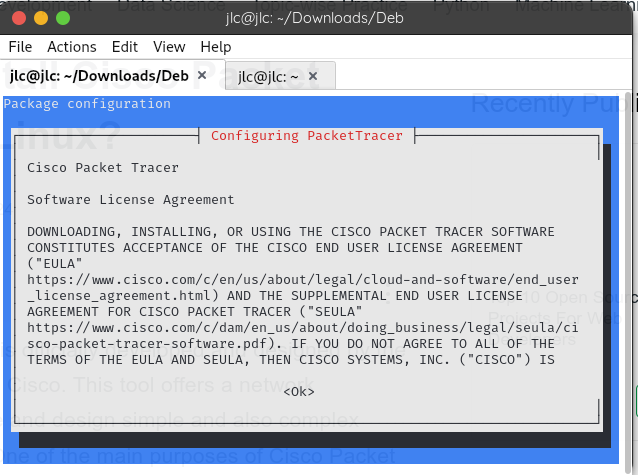
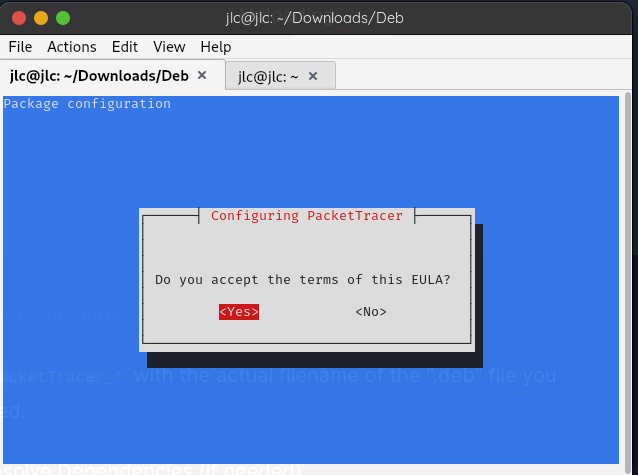
To agree to the software licensing agreement, press Enter or press space.
Replace PacketTracer_* with the actual filename of the ".deb" file you downloaded.
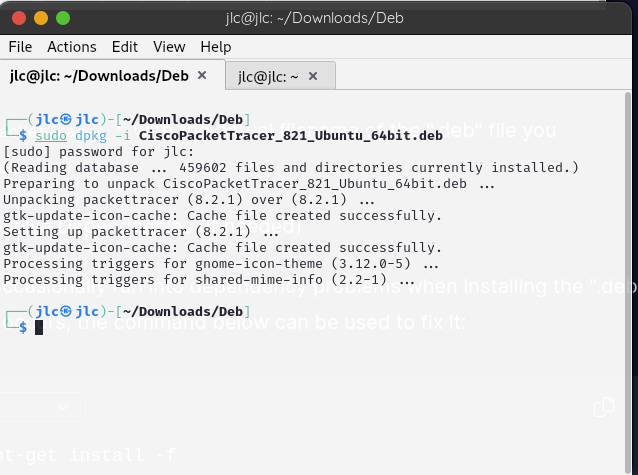
Step 5: Resolve Dependencies (if needed)
You may occasionally run into dependency problems when installing the ".deb" file. If this occurs, the command below can be used to fix it:
sudo apt-get install -f
This command will resolve and install any missing dependencies automatically.
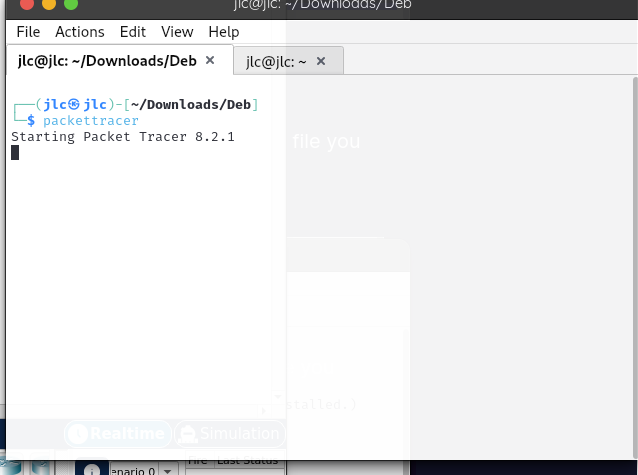
Step 6: Launch the Cisco Packet Tracer
When the installation ends, enter the following command in the terminal to start the Cisco Packet Tracer:
packettracer
Re-enter the credentials that were registered on the skillsforall or Netacad websites.
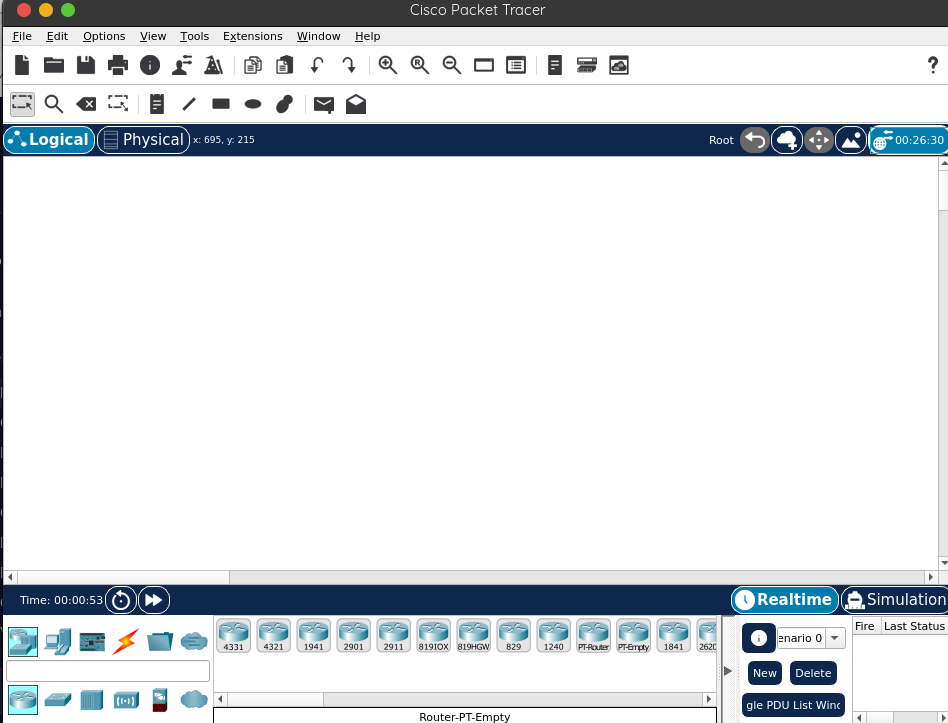
The Cisco Packet Tracer should now open and be ready for you to use.
Conclusion
The procedures for installing Cisco Packet Tracer on a Linux machine have been discussed in this guide. Before beginning the installation process, make sure you obtain the ".deb" file from the Cisco Networking Academy website. Cisco Packet Tracer is a useful tool for both pros and students because it allows you to practice and hone your networking abilities on a Linux computer. Enjoy learning more about networking!


